Are you a fan of Minecraft? Would you like to run a Minecraft server to which people can connect and play using their Windows computer, their Android device, their iOS device, or maybe their Playstation or their XBOX? It is very easy to run a Minecraft bedrock server on a VPS, and it doesn’t even have to be very expensive. Follow these instructions step by step and you will be ready to play Minecraft on your brand new server in 10-15 minutes!
I am not a big fan of Minecraft myself, but I have kids who love the game and it was because of them that I actually discovered how easy it is to create and run a Minecraft server using a VPS. Why mess around? Follow these steps yourself and you will be ready in a few minutes!
Step 1 – Buy a VPS
The first thing you need is an actual VPS. I have tested lots of VPS services, and the easiest and cheapest options are VPSServer and Contabo.
Visit one of those sites, create a brand new user and then purchase a VPS. The cheapest options will be enough. Below you can see the different options with Contabo and the VPS S solution is more than enough to run a Minecraft Bedrock server.
Go for Contabo instead of VPSServer
After testing both solutions, we can clearly say that Contabo and their cheapest package (which costs $1 more per month) is WAY better than the cheapest VPSServer package. The cheapest VPSServer package will quickly tell you that it doesn’t have sufficient capacity to run the server (if there are a couple of users connected), while you will have much better quality with the cheapest Contabo package).

When you have purchased a package, wait for a few minutes and you will receive the login credentials to your email address and you can also find them in your dashboard. While waiting, download Solar Putty and install it on your computer.
Connect to the VPS using Solar Putty
After a few minutes, you will have received an email with the IP address of your new server and also the login credentials. Start the Solar Putty program and create a new session. Add the IP address of the server, the username (root) and then the password and just give the login credentials a name (see example below).
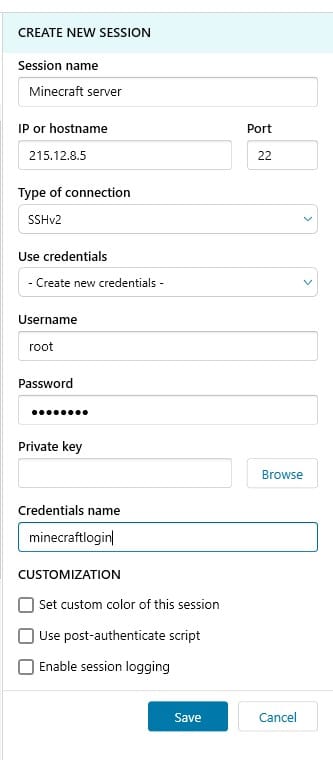
When you have saved the data you will return to the start screen of Solar Putty. Connect to the server and accept whatever message/warning might come at you as you connect to the server for the first time.
Minecraft Bedrock server – time to start!
The major part of the job has already been done. Now you have to run the following commands.
apt-get update
apt-get upgrade -y
apt install unzip
apt install screen
All the necessary preparations have been made. Now you better visit https://www.minecraft.net/en-us/download/server/bedrock. There you will see the link to the Ubuntu software for the Bedrock server. Just like you see in the picture below, right-click your mouse on the download button and copy the link location.
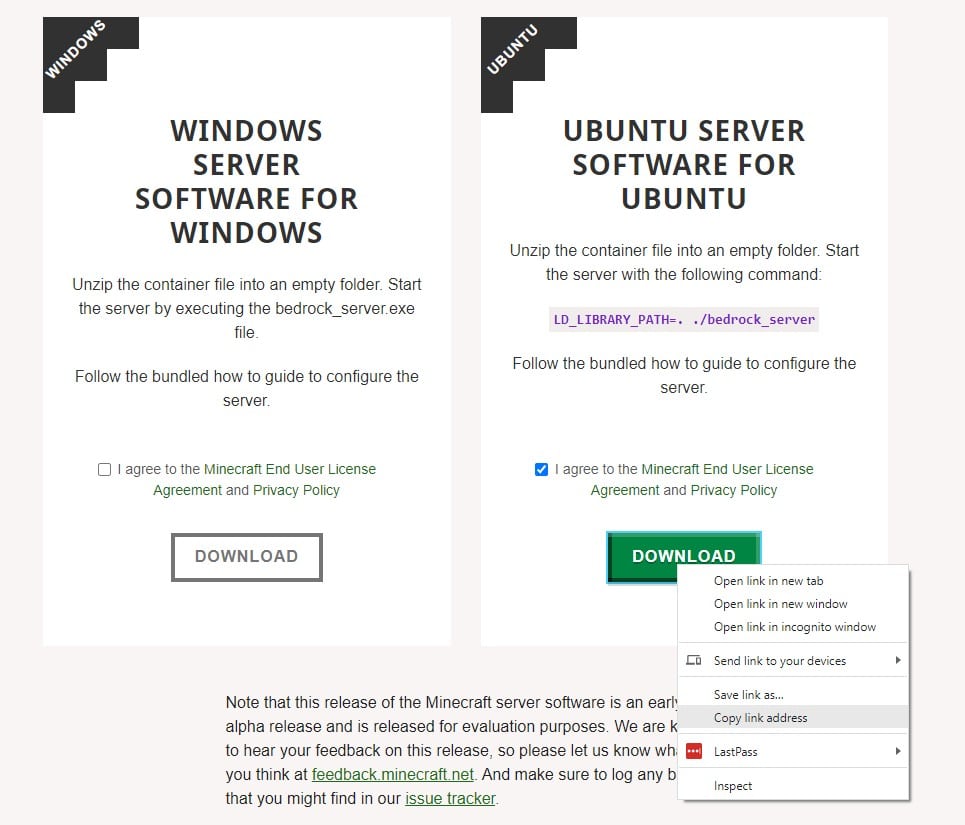
When you have this information, return to Solar Putty and type wget and right-click your mouse next to the wget text. This will paste the link and it will look something like what you can see below. At the time of writing, the newest version of the server was 1.18.2.03 and that you can see reflected in the text below.
wget https://minecraft.azureedge.net/bin-linux/bedrock-server-1.18.2.03.zip
unzip bedrock-server-1.18.2.03.zip
screen (this command will show you some information -> click enter to move on)
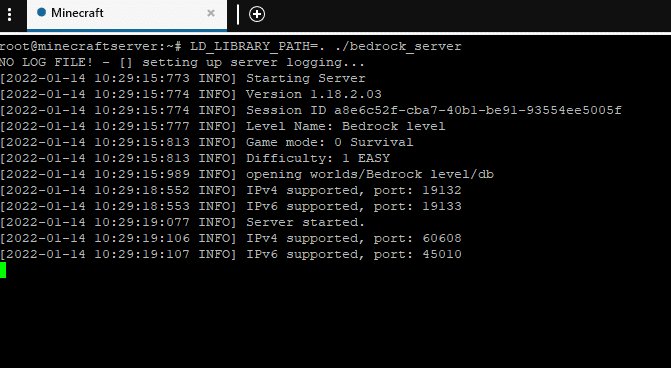
LD_LIBRARY_PATH=. ./bedrock_serverIt is important to also use the correct file name (if a newer file name exists) in the unzip command following the wget command above. This isn’t complicated at all so you will fix this with no trouble. The screen command is running in order to make the server run, even though you close the actual Solar Putty program.
The final part is to start the bedrock server and as you run the final command above, the server will start.
Connect to your brand new Minecraft VPS server
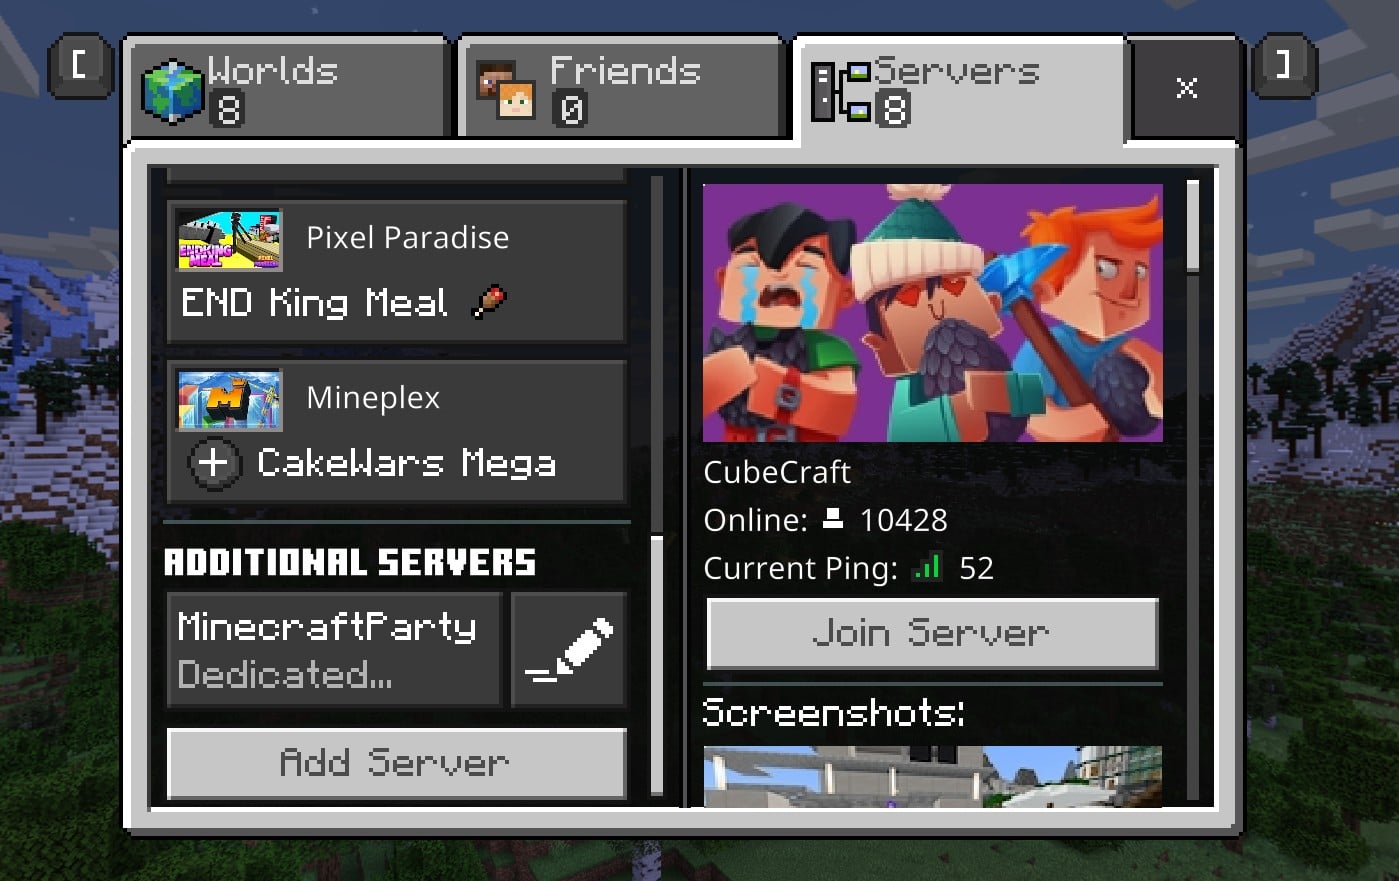
Now it is time to start Minecraft. Inside the game, choose Servers and then scroll down and manually Add Server.
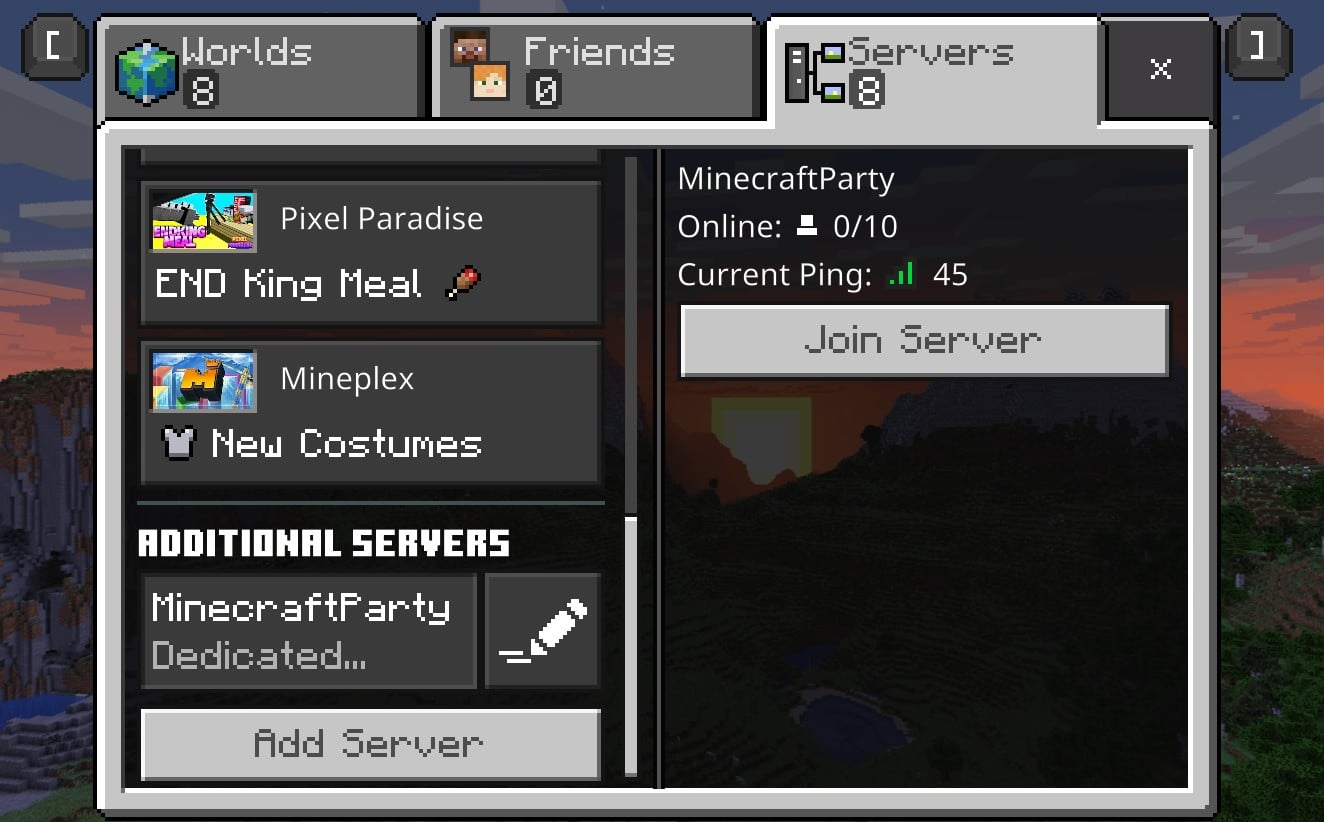
The next screen will let you give the server a name and then you have to type the IP address of the VPS that you are using. You do not have to make any changes to the port in use.
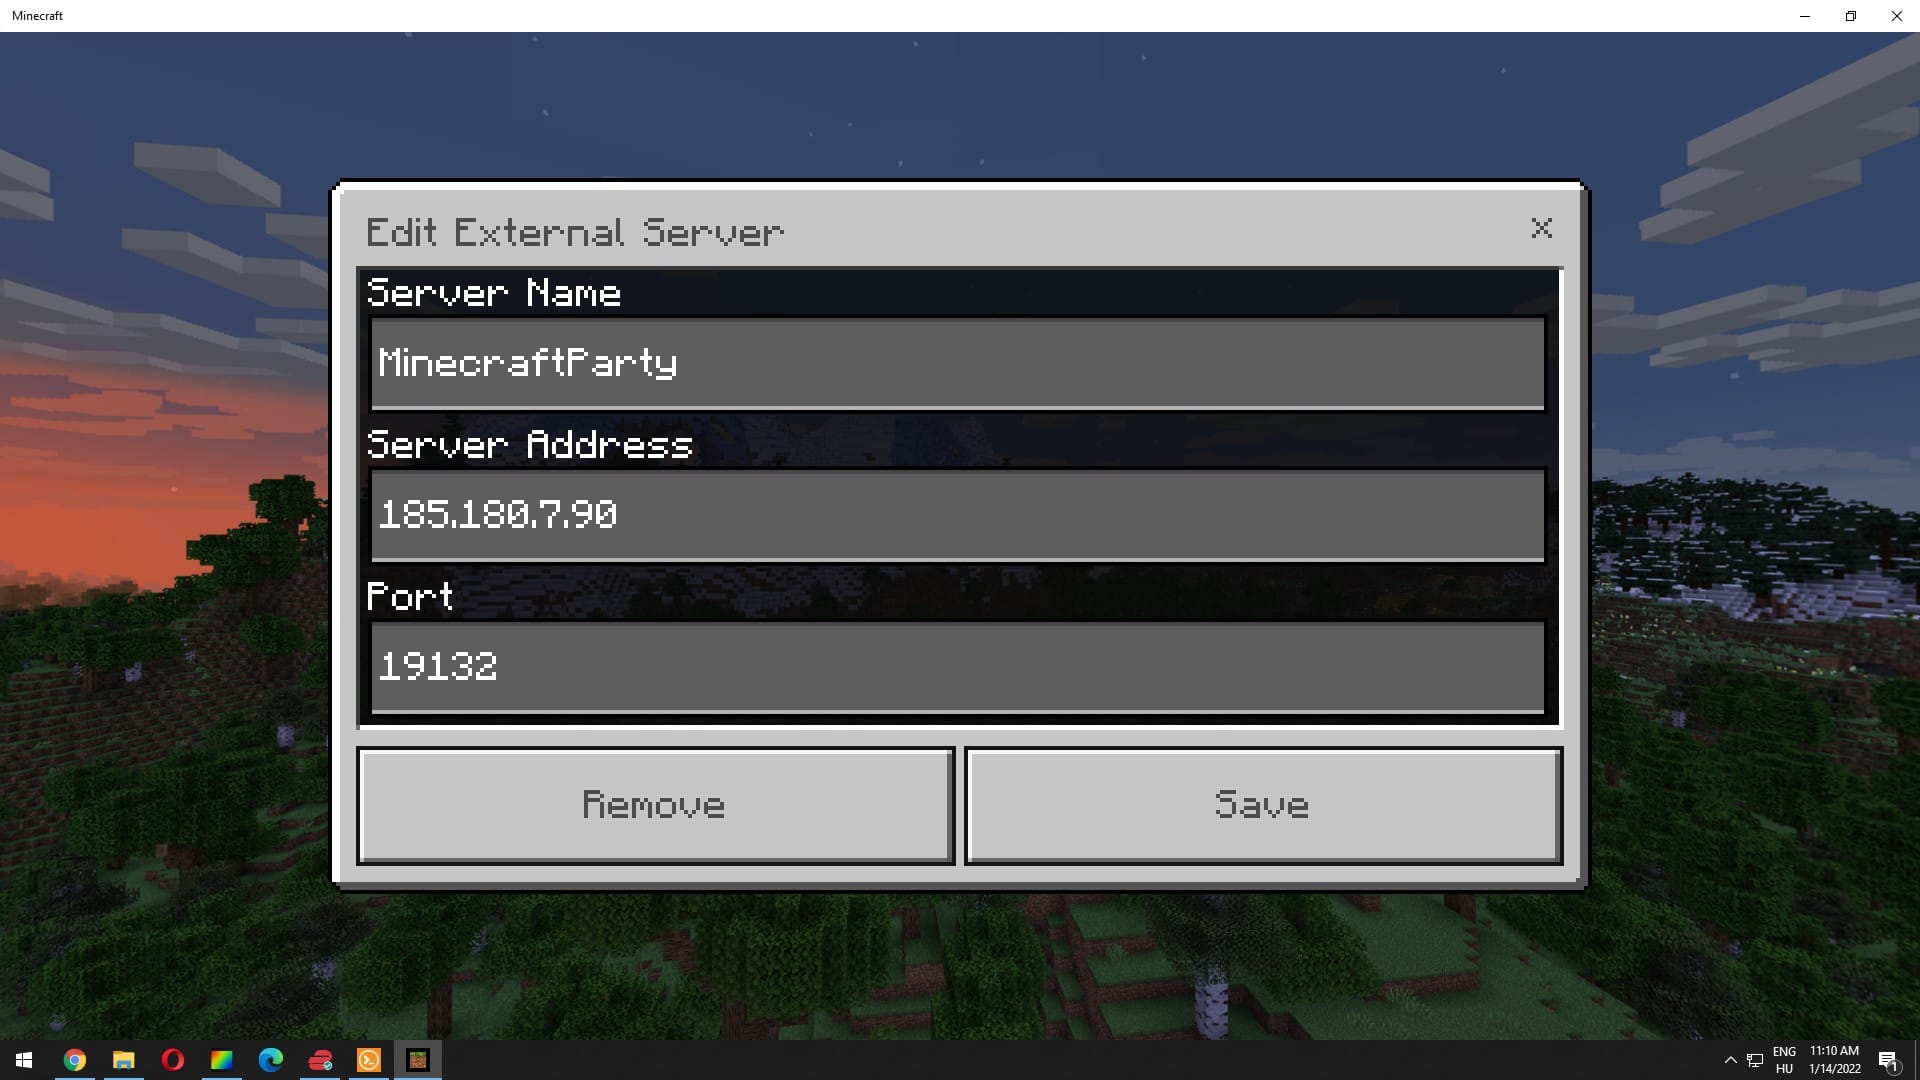
When you are finished, click Save. You will now return to the server screen where you will find your brand new server. Click to join the server and you are about to enter your brand new Minecraft world. In the same way, you can share the IP address with your friends and enemies and invite them all to come and play in your brand new Minecraft world.
Make yourself an operator on the Minecraft server
By default, there are no operators in the world making it impossible to change whether you want to play in survival mode, creative mode or some other mode. When you connect to your server, you will see a message in the actual VPS telling you that you or someone else has joined the server. To make yourself an operator, simply type the following command (watch our for capital letter).
op yourusernameIt is important that you have to be connected to the server with the user for the command to work. This will immediately make you an operator and as an operator, you can also change the status of other users connecting to the server.
It is time to start the Minecraft party
You should now be ready to play and have fun as you and your friends play Minecraft together. You can use the server to connect with friends all around the world in Minecraft and you can connect to the server using Android, iOS, Playstation, Windows, XBOX, and Minecraft on different platforms.
If you have any further comments, questions, or feedback, please use the comment field below.
