Yesterday was the big day for Windows 10 as it was made available to users all around the world for free, as an upgrade from licensed versions of Windows 7 and Windows 8. We upgraded as well and this morning we spent some time just testing some popular VPN providers to check if their VPN clients worked out fine in the new operating system from Windows.
 Our goal was to watch StarSports in India and for that purpose we tested PureVPN, IPVanish, HideMyAss and VyprVPN. The most important was to check if their applications worked fine in the new operating system, and before continuing we can calm everyone down by saying that they all worked well, all apps run without error messages and in fact some of them started even faster than they did in the earlier Windows versions! Good point to everyone!
Now the point is that they all worked in Windows 10, and then the second question could be whether they worked well with StarSports in India or not. That is a different question which really has nothing to do with Windows 10, but we can anyway share the report on how it worked. After all the Premier League is about to start in less than two weeks, and StarSports in India is for sure the coolest and cheapest place to watch the action online. Before giving you that information, lets first write down how to manually change DNS servers in Windows 10.
Changing DNS servers in Windows 10
To change your DNS servers in Windows 10 you need to follow these steps.
- Press the Windows start button down in the left corner.
- Press Settings.
- Press Network & Internet.
- You will arrive to WiFi settings. Scroll down and press “Change Adapter Options.”
- Select your current connection, right click and press properties.
- Select TCP/IP protocol 4 (TCP/IPv4) and press properties.
- Select Use the Following DNS server addresses and type inn your given DNS servers.
- Press “Validate settings upon exit.”
- You are now ready to press okay and surf using those DNS servers.
Setup a VPN connection manually in Windows 10
If you want to manually setup a VPN connection in Windows 10 that is as easy as can be. Follow these steps and you should be ready to setup your connection right away.
- Press the Windows start button down in the left corner.
- Press Settings.
- Press Network & Internet.
- Select VPN from the menu on the left side.
- Press Add a VPN connection.
- Now you are to fill in the forms, and here is a short guide you through for what to write.
- VPN Provider: Windows (built-in)
- Connection name: Give the connection a name (you decide).
- Server name or address: Add the server name or IP address of the server you want to connect to. You will find this address on the website of the VPN provider you are using.
- VPN type: Depends on what you want and what your provider supports. If the goal is to watch TV online from abroad and security does not matter, then PPTP is the fastest. If secure is more of importance, select one of the others. More about VPN protocols here.
- Type of sign-in info: Select user name and password, and in the user name and password fields enter the user name and password you have received or selected yourself as you signed up for the VPN subscription.
- Press save!
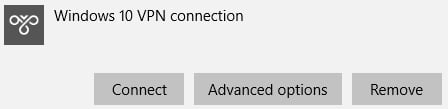
- You will now see the VPN connection in the VPN menu. Why not give it a try right away to see if it works?
How did our StarSports test go?
So, we started with VyprVPN and unfortunately for some reason we got the message that StarSports could not be watched, even if we were connected to the VyprVPN server in India, so that was not a promising start. Then we went for HideMyAss, and everything worked out fine, the stream loaded well and we could watch the cricket match between England and Australia without buffering.
With IPVanish things were exactly the same as they were with HideMyAss, while with PureVPN the connection was a bit more lagged, meaning the quality of the stream was not as good. Despite the poorer quality on the StarSports stream as we used the PureVPN VPN connection, it was much better with the PureVPN SmartDNS than any of the other VPN providers could offer with their normal connections.
Conclusion… PureVPN is probably the best option for watching StarSports as they have both the VPNs and the SmartDNS service, so here you even have the change of mixing and varying, depending on the results and quality you get!
